Wednesday, February 16, 2011

Tub Tea

I just so happen to love tea, and I figured why not have some for your bath tub?!  I started out by grinding some rose buds and lavender buds together.  I then added them to a mixture of dead sea salt, epsom salt, milk powder, some essential oils, and a bunch of other fun things.  I then placed them into some heat sealable tea bags and sealed them up. All I know is they smell divine!  It was such an easy thing to make, and I can't wait to have a bathtub to drop one in!

I had given my mom some of these for Christmas and she loved them so much I sent her some more for Valentines Day.  She knew I had sent some because she could smell these little beauties in the mail box!  She loves them so much she puts them in her drawer to scent her clothes, as well as uses them in her tub to enjoy a nice fragrant treat!

Here is some pictures of the process:

Lavender & Rose Buds in the grinder


Ground Buds added to the salt mixture


MIxture all mixed together


Tea bags ready to be filled


The filling of the tea bags


The tea bags after filling and sealing


The final product!!


Sunday, February 13, 2011

Eyelash Extensions

A couple weeks ago I went and got eyelash extensions to see what all the hype was about... All I can say is OMG!  How did I ever live without them?!?!  Normally my morning routine takes me anywhere between an hour and an hour and a half (this includes shower)  With eyelash extensions... 25 mins!  I haven't felt the need to wear makeup because I look like I wake up ready!  How perfect is this?!  The issue I had with getting the extensions was the cost!  I mean who can really afford to get eyelash extensions done every 2 weeks?  The cost of them is anywhere between $60-$400 depending on the type of lashes you get, and where you get them done. 

Now the best eyelash extensions that you can get are the individual ones.  They glue individual lashes to your natural lashes.  This process is quite time consuming and the most expensive option.  It takes about 2 hours and the average cost is about $250 bucks!  Ouch!  The other option is the lashes that are grouped together.  They have about 3-5 eyelashes per bunch and are glued to a couple of your eyelashes at a time.  This also happens to be the procedure I opted for!  It cost me $60 big ones and in the end I was quite happy with the results!  I also got a ton of compliments on them, and a 70 year old lady approached me at the spa to ask me if they were real, and then wanted to know where I got them done because she had to have them!  It was actually quite cute!  Anyways,  I did the math and figured it out... if they last two weeks, that's about $4.00 a day (if you need to justify it to your other half). 

I was in town and stopped in at the beauty distributor to see what they had in there.  I was in luck! I found some extensions, glue, and my grand total was.... $11.58. That was for the glue (which should last for quite awhile), and for the lashes. I got 56 individual lashes which should last me a couple of applications. It was a lot easier than I initially thought once I got the hang of it. I think they turned out rather great! I'm happy with them, and its Mascara free for me!


before:  Keep in mind, I still have a few extensions on from when I had them done.  I just wanted to show you the difference it made!


Before:  You can see how much longer the extensions are compared to my natural lashes


After:  My first attempt, so it can only go up hill from here!  I love how much thicker my lashes are with them on.

After:  They are beautiful!  I got some glue on my lids (the little brown spot)  Make sure when you are doing this (if you so decide to) that you buy glue that matches your eyelashes.  Mine is a dark brown colored glue.  You'd want a blond colored one if you have lighter lashes.


The final product!  Look how vibrant it makes my eyes.  It is such a natural look, but I love it!  All I have on is a tiny amount of cover up, a quick splash of blush, and a tiny swipe of lip gloss.  TA DA!  My fairy godmother couldn't have done better if she would have tried!

Thursday, February 10, 2011

Lip Balms

I've been creating again!  I love lip balm, I just find that most of the ones I buy at the store don't really do anything for my lips.  I have to apply, and re-apply constantly so that my lips stay soft.  I figured if I made my own, I could play around with ingredients and come up with a lip balm that is long lasting and super hydrating.  I think I found the ticket!  I had made some for my family at Christmas and my mom has ordered some more for herself, and some to give away to her friends.  Thank goodness for family that supports you!  I love how great she is with trying to promote me!  I might just have to hire her when things pick up!.... tangent... anyways, my fabulous sister in law made a comment about how when you're used to having a lip balm that tingles it makes it hard to use something else that's just plain.  Well Tash, you're in luck.  I created a new one, just for you, with Spearmint Essential oil.  It gives that subtle tingle!  I currently have 3 lip balms that I'm selling.  Stay posted, as they will appear in my Etsy Shop shortly.  The new flavors are....

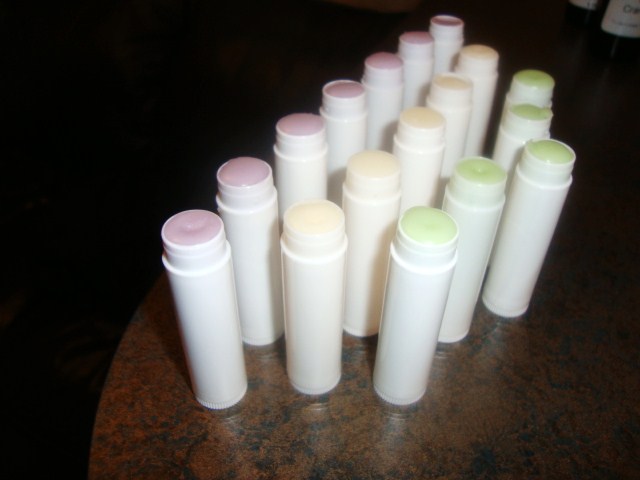
SPEARMINT & CITRUS: It's a fresh scent.  Not over powering with a hint of citrus.  I used some lime essential oil in here, as it is a natural disinfectant, and acts as a preservative... just natural!  That means no chemicals! 

VANILLA BEAN & CITRUS:  mmmm!  All I know is I'm tempted to lick this one!  It smells just like dessert!  This is a must have for any lip balm junkie! Again, this one has the lime, so it is chemical free!  YAY!

POMEGRANATE LIME:  This is my favorite of the 3 by far!  I just love the sweet smell!  The smell reminds me of sweet tart candies!  Yum!  And once again, LIME! 

Wednesday, February 2, 2011

Guest Makeup

I did my lovely Sister-in-laws makeup the other day. She is the ever talented genius behind the blog REQUIRED2BEINSPRED. I think it turned out rather lovely! I think it has more to do with the fact that she is a natural beauty rather than my "makeup doing" skills. I'll let you be the judge!


Before picture....


After applying concealer and foundation to even out the skin tone


I picked a purple color to bring out the green of her eyes (which you can't see, obviously)  I thought I would show you how much larger her eyes look once they have had eyeshadow applied.  I used the Lise Watier pallet I showed you the other day

GORGEOUS!  I used Dior Lip Glow on her lips to just bring out the natural color!  And I think it helps her eyes pop even more!
Now I thought I had taken a picture of her once we took the towel off but I guess I thought wrong.  You can sneak over to her blog today to check her out!  While you are there you can browse through her DIY posts, her ETSY shop, and learn about her fabulous style!  Thanks Tash for letting me use you as a model!  You are such a beautiful woman!  Good luck with your 30 for 30 Challenge!